Are you worried about your aging loved one’s safety in the bathroom? Installing grab bars can help them stay independent and avoid falls. But, do you know the right way to put them up? Learn expert-approved methods in this guide on installing grab bars for seniors.
Key Takeaways
- Properly determining the right placement for grab bars is crucial for accessibility and safety
- Locating wall studs is an essential step to ensure a secure installation
- Using the correct tools and materials is vital for a professional-looking finish
- Carefully marking and drilling mounting holes ensures a sturdy, long-lasting grab bar
- Completing the installation with silicone caulk provides water protection and a seamless look
Determine Placement for Grab Bars and Locate the Stud
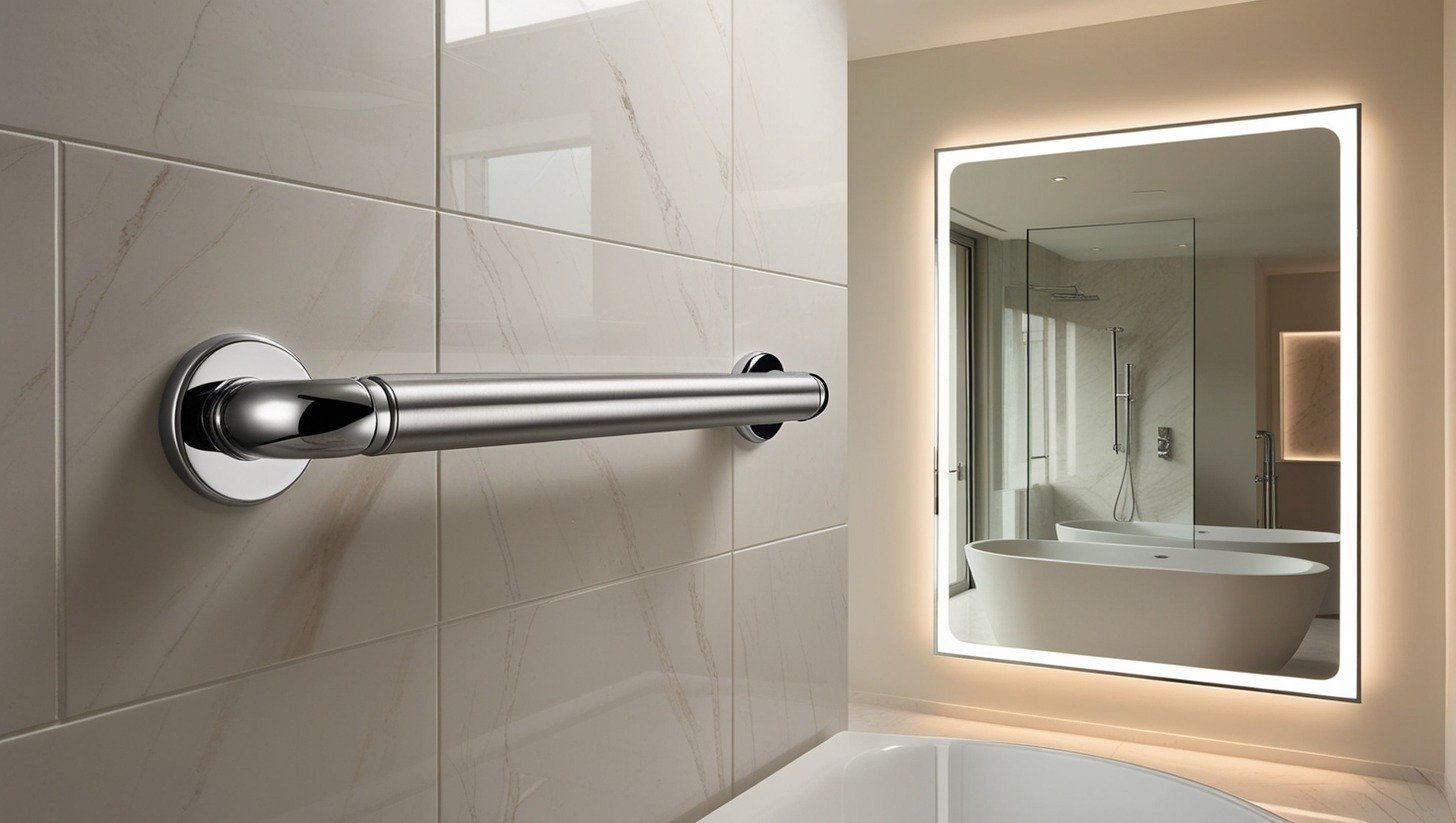
Putting your grab bars in the right spot is key for their safety and effectiveness. For bathroom grab bars, the placement is very important. They should be 33 to 36 inches from the floor, at a height that’s easy for users to reach.
This height helps seniors and people with mobility issues get the support they need.
Grab Bar Placement Guidelines
Grab bars need to be attached to a wall stud or an anchor for safety. Wall studs are usually 16 or 24 inches apart. Finding these studs is crucial for a strong installation.
The best way to find a stud is with a stud finder. If your walls are tiled, you might need to look behind the tiles. You can do this by searching for switches and outlets or by drilling a small hole to feel for the wall stud.
Tips for Locating Wall Studs
- Use a stud finder to quickly find where the wall studs are.
- Look for electrical outlets, light switches, or other fixtures that are on wall studs.
- Tap on the wall to hear a solid sound, which means a stud is there.
- If needed, drill a small hole to make sure a stud is there before putting in the grab bar.
By following these grab bar placement guidelines and tips for finding wall studs, you can make sure your grab bars are installed safely and securely. This ensures they provide the support and safety your bathroom needs.
Gather Essential Tools and Materials
Getting ready for a grab bar installation means collecting the right tools and materials. You’ll need a set of reliable equipment for an efficient and secure installation. Here are the key items you should have before starting your project.
Necessary Tools for Grab Bar Installation
- Power drill with drill bits
- Stud finder to locate wall studs
- Tape measure for precise measurements
- Level to ensure proper alignment
- Safety glasses to protect your eyes
Required Materials
- Grab bars, either metal or ADA-compliant
- Wall anchors or screws for secure attachment
- Silicone caulk to seal and waterproof the installation
- Painter’s tape to mark drilling locations
You might also need drywall anchors or toggle bolts for certain walls. Having all the grab bar installation tools and grab bar installation materials ready makes the process smoother. This ensures your bathroom safety accessories are securely installed.
| Tool or Material | Purpose |
|---|---|
| Power Drill | Drilling holes for grab bar anchors |
| Stud Finder | Locating wall studs for secure attachment |
| Tape Measure | Measuring for proper grab bar placement |
| Level | Ensuring the grab bar is installed level |
| Wall Anchors | Providing additional support in drywall |
| Silicone Caulk | Sealing and waterproofing the installation |
With the essential grab bar installation tools and grab bar installation materials ready, you’re set to move forward with your bathroom safety project.
Remove the Escutcheon
The first step in installing a grab bar is to take off the escutcheon. This is the decorative, flat metal piece that covers the grab bar’s mounting hardware. You can loosen it by tapping or prying it from the back. This action prepares the surface for the grab bar.
- Locate the grab bar escutcheon.
- Use a flat-head screwdriver or putty knife to pry the escutcheon away from the wall, starting at the edges.
- Apply gentle pressure until the escutcheon comes loose, showing the mounting hardware behind it.
Removing the escutcheon is key to installing a grab bar correctly. It lets you access the mounting points for a secure installation. After removing the escutcheon, you can move on to the next steps of placing and securing the grab bar on the wall.
“Properly removing the escutcheon is key to a successful grab bar installation, as it provides direct access to the mounting hardware and wall surface.”
Position the Grab Bar
Putting grab bars in the right spot is key for bathroom safety and ease, especially for seniors. It’s important to place them correctly and at the best height for easy use.
Proper Grab Bar Height
The grab bar should be between 33 and 36 inches off the floor. This height makes it easy to reach and use, helping users of all heights. Having it in this range boosts bathroom safety.
Aligning the Grab Bar
Use a stud finder to find the wall stud for the grab bar. Put the bar on the wall, making sure the holes line up with the stud. Then, check with a level to make sure it’s straight and even. This ensures the bar is stable and safe to use.
By following these steps for placing and aligning the grab bar, you make your bathroom safer and easier to use for seniors and those with mobility issues. Grab bars installed correctly can greatly improve bathroom safety and quality of life.
Mark the Mounting Hole
Getting ready to install bathroom safety grab bars means marking the mounting holes on the wall. This step is key to making sure the grab bars are set up right. It gives seniors the support and stability they need.
Use a pencil to mark the locations of the mounting holes on the wall. Before drilling, pick a drill bit made for tile. Screws can crack tiles if tightened too much, so choose the right bit.
- Identify where you want the grab bar on the wall.
- Mark the spots for the mounting holes with a pencil.
- Make sure the drill bit is good for tile surfaces.
- Don’t overtighten screws to avoid tile cracks.
By marking the grab bar mounting holes and picking the correct drill bit, you’re setting up for a successful installation. Take your time to make sure the grab bars are in the right spot and securely fastened. This will improve bathroom safety for seniors.
Drill Holes into the Stud
It’s time to start drilling for your grab bar after marking the spots. This step is key for a secure installation, as you’ll attach the grab bar to the wall studs. Drilling pilot holes helps prevent the wall from cracking during installation.
Drilling Pilot Holes
First, take the grab bar off the wall. Then, use a 1/8-inch drill bit to make pilot holes at the marked spots. These holes act as guides for the screws, making installation easier without harming the drywall. This ensures a strong grab bar that can hold a person’s weight safely.
- Carefully align the grab bar with the marked spots on the wall.
- Use a 1/8-inch drill bit to create pilot holes at each marked spot.
- Drill the pilot holes deep enough for the screws you’ll use.
- Make sure the pilot holes hit the wall studs right in the middle for the best support.
Drilling these pilot holes sets the stage for a secure grab bar installation. It gives you peace of mind and safety for many years. The drilling holes for grab bar installation and grab bar mounting process are key steps.
How to install grab bars for seniors
Securing the grab bar to the wall is key for bathroom safety. To install grab bars for seniors, screw them into the wall stud’s pilot holes. Make sure the screws are tight for a secure installation.
If there’s no wall stud, use recommended wall anchors for a strong hold. This keeps the grab bar from shifting or falling, keeping your bathroom safe.
- Carefully align the grab bar with the pilot holes drilled in the wall stud.
- Insert the screws into the pilot holes and tighten them firmly using a screwdriver or power tool.
- If no wall stud is present, use the appropriate wall anchors to securely mount the grab bar to the wall.
- Ensure the grab bar is firmly in place and can support the weight of an individual.
By following these steps, you can install grab bars for seniors safely. This makes your bathroom safer and more accessible. It’s key for bathroom safety for the elderly and helps them feel secure.
“Investing in installing grab bars for seniors is a simple yet effective way to create a safer bathroom experience and prevent falls or accidents.”
Secure the Grab Bar
Now that you’ve placed your grab bar and marked where it goes, it’s time to attach it. Using screws to fasten the grab bar is key for its stability and safety. Let’s look at how to secure your grab bar with screws.
Fastening with Screws
First, take the grab bar off the wall. Next, put the screws from your grab bar kit into the holes you drilled. Make sure to tighten them well, so the grab bar stays put and doesn’t move.
- Remove the grab bar from the wall.
- Insert the screws provided with the grab bar kit into the pilot holes.
- Tighten the screws firmly to secure the grab bar in place.
- Ensure the grab bar is stable and does not wobble or move.
It’s vital to secure grab bars with screws for their safety and long life. By doing this, you can trust that your grab bar is well attached and ready to help seniors safely.
“Securing grab bars with screws is a crucial step in ensuring their stability and safety for seniors.”
Fastening grab bars with screws is easy but important. Spend the time to attach the grab bar right, and you’ll have a strong support system for many years.
Complete Grab Bar Installation
Congratulations, you’ve installed your grab bars! Now, finish with sealing for a professional look. Apply silicone caulk around the escutcheons to seal out moisture. This keeps your walls safe and the installation strong.
Applying Silicone Caulk
To seal your grab bars, just follow these steps:
- Make sure the surface is clean and dry.
- Put a small bead of silicone caulk around the escutcheons and wall.
- Use a damp cloth or your finger to smooth it out.
- Wait 24-48 hours for the caulk to cure, as the instructions say.
Finishing with this step makes your bathroom look better and keeps your grab bars safe. It’s a key step for a good-looking and lasting installation.

“A properly installed and sealed grab bar can provide a lifetime of safety and peace of mind for seniors or those with mobility challenges.”
Sealing your grab bars well is important. It makes a big difference in how well they work and look over time.
Professional Grab Bar Installation Services
If you’re short on time or prefer the expertise of a professional, consider seeking out professional grab bar installation services in your local area. These experts can assess your bathroom layout and find the best spot for the grab bars. They ensure a secure and code-compliant installation for your peace of mind.
For bathroom safety services for seniors, professional installation is key. Experienced technicians know how to place grab bars for the most stability and support. This includes areas near the toilet, shower, and bathtub. With their help, you can be sure your grab bars are installed right, lowering the risk of falls and accidents at home.
“Maintaining independence and safety at home is crucial for seniors, and having properly installed grab bars can make a significant difference. Professional services ensure a customized solution that meets your needs and provides the peace of mind you deserve.”
Professional grab bar installation services offer more than just technical help. They include:
- Comprehensive bathroom assessments to identify high-risk areas
- Personalized recommendations for grab bar size, style, and placement
- Durable, rust-resistant hardware for long-lasting performance
- Complimentary cleanup and disposal of any debris
Choosing a reputable bathroom safety services provider for seniors means you get peace of mind. Your home stays safe and accessible for years to come.
Conclusion
Installing grab bars in your bathroom is key to making it safer and more independent for seniors. This guide shows how to place, mount, and secure grab bars for your loved ones. Make sure the bars are easy to reach and work well.
With the right tools and methods, you can make your bathroom safer and easier for seniors. This lets them move around without worry and gives peace of mind to those who care for them. Making bathrooms safe helps seniors stay independent and live better.
If you’re a homeowner or caregiver, this article gives you the steps to improve bathroom safety for your loved ones. Adding grab bars is a big step in making a difference in seniors’ lives. With some effort, you can turn your bathroom into a safe and cozy place for the elderly. Read through SeniorThrive to learn more about senior safety!
Source Links
- https://www.homedepot.com/c/ah/how-to-install-grab-bars/9ba683603be9fa5395fab901dbd10401 – How to Install Grab Bars
- https://www.lowes.com/n/how-to/grab-bar-essentials – How to Install a Grab Bar in a Bathroom
- https://www.wikihow.com/Install-a-Grab-Bar – How to Install a Grab Bar: 8 Steps (with Pictures) – wikiHow